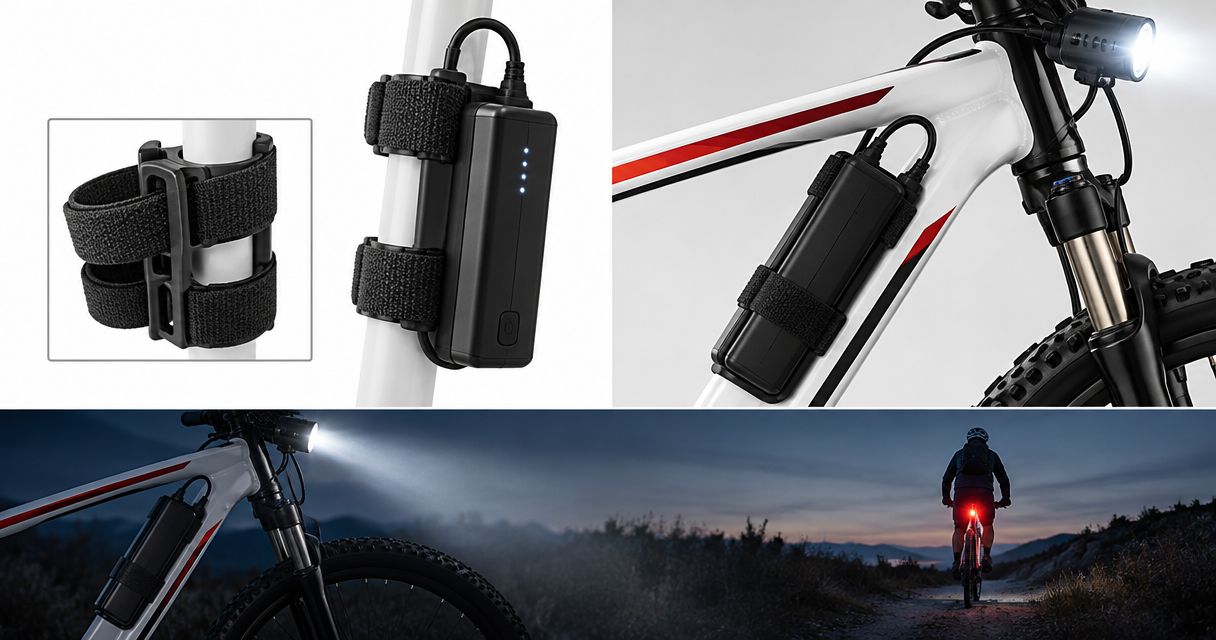
Secure an external battery for rechargeable bike lights with the pack’s approved holder or straps, on a frame position that keeps it clear of your legs, moving parts and trail debris. Route the cable with enough slack for steering and suspension movement, then check that neither the pack nor cable can shift into danger. A tight strap alone is not enough: the mount, frame contact and cable route all need to work together.
- Secure rechargeable bike lights with a compatible battery holder, protected frame contact and a cable route clear of moving parts.
- Check steering and suspension movement before riding; a tidy cable can still pull tight.
- Bikelights sells bike lights and high-capacity battery packs; confirm compatibility before choosing your complete night-riding setup.
- Stop and refit a battery that slides, rotates or pulls on its connector.
Why this matters
An external battery adds something else to secure, but it also lets you position the pack separately from the light. That flexibility is useful only when the mounting position suits your actual bike.
For your 2026 night-riding setup, treat the light, battery, mount and cable as one system. Before fitting anything, check bike-light battery compatibility: a connector that fits is not proof that the battery and light work safely together.
Mount the battery securely without making the cable carry its weight. If the pack slips, a connected lead must not become its safety rope.
How do you secure an external bike-light battery on your frame?
Start with the mounting instructions for your battery and bike. Use the supplied or explicitly compatible mounting equipment, and follow any restrictions on frame materials, strap placement and tightening. Do not improvise a rigid clamp around a carbon frame or tighten a mount beyond its instructions.
The sequence below works as a practical fitting check, not a replacement for model-specific directions. If an approved holder does not fit your frame properly, change the mounting arrangement rather than forcing it.
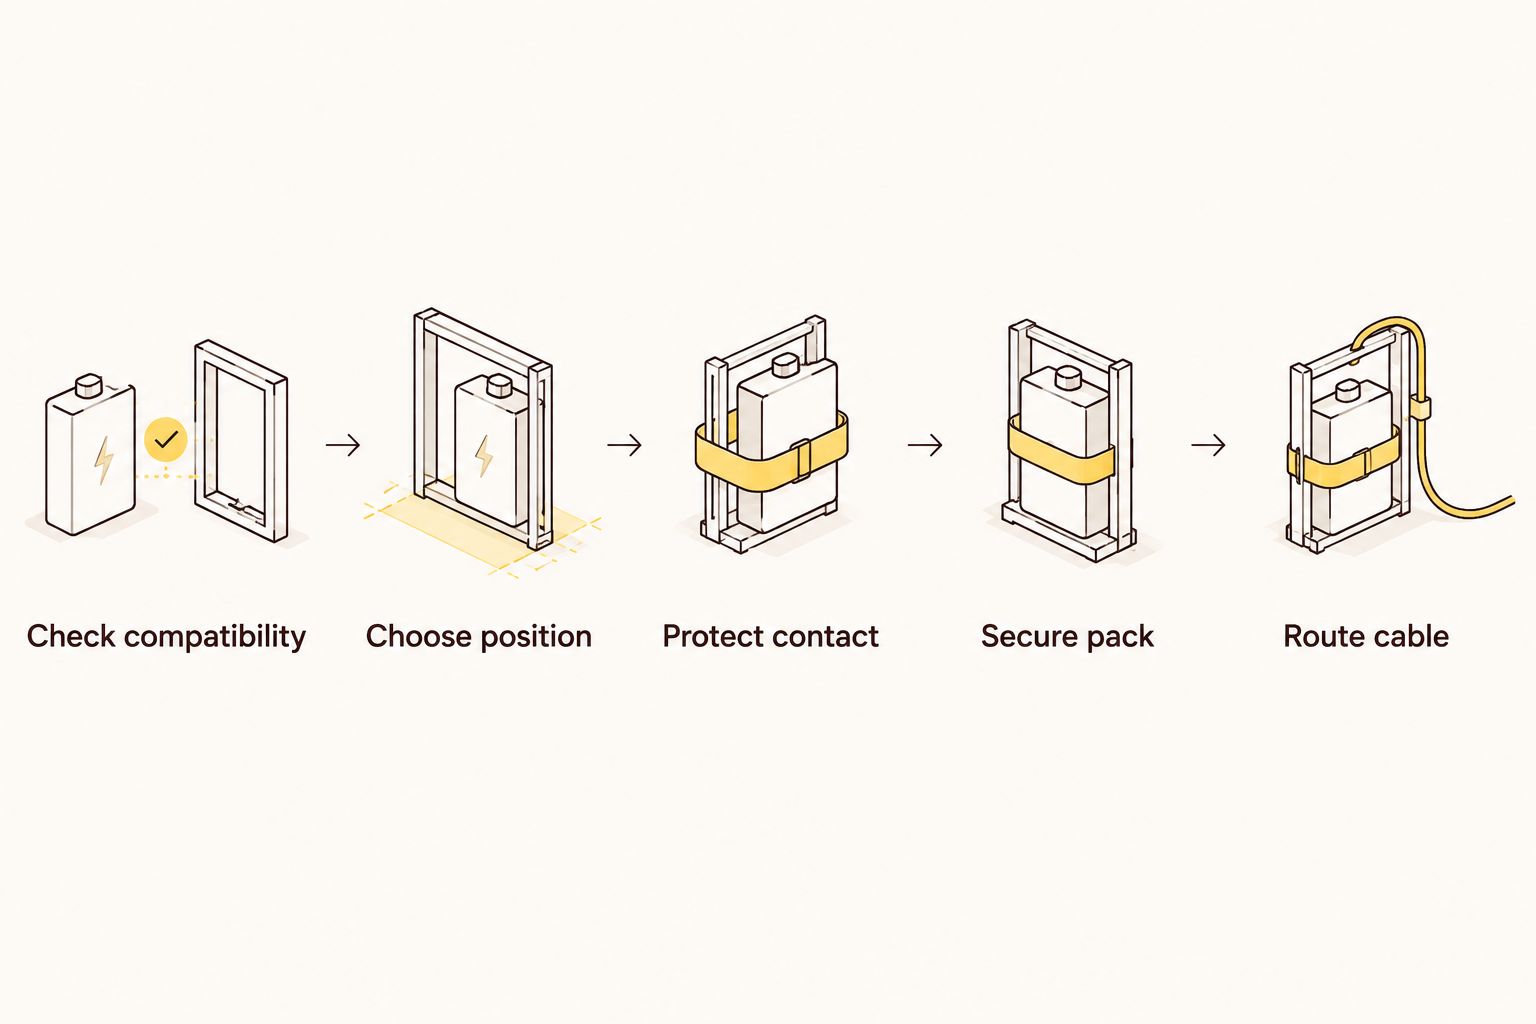
Check compatibility
Confirm that the battery, light, charger and mounting hardware are intended to work together. Check the specified voltage, connector arrangement and any restrictions in the instructions; do not judge compatibility by connector shape alone.
Inspect the pack before mounting it. Do not use a battery with swelling, damaged insulation, a crushed casing or a damaged lead. A strap cannot fix a battery fault, and a pouch should not hide one.
Choose position
Hold the battery in the proposed position before fastening it. Check access to your bottle, shock controls and any frame storage, then sit on the bike and turn the cranks to check leg clearance.
Look beyond how the setup sits in the workstand. A spot that looks neat while stationary still needs clearance when you steer, pedal and move around the bike. Keep the pack away from tyre contact and exposed moving parts.
Protect contact
Clean the frame and the mount’s contact surfaces. Grit trapped beneath a strap or holder can rub against the finish as the bike moves.
Use frame protection and padding only where permitted by the relevant instructions. Soft material is not automatically a better mount: if it compresses or slides, the pack can loosen. Keep contact surfaces stable and avoid trapping existing brake hoses or gear cables beneath the battery.
Secure pack
Fit the holder or straps exactly as directed. Seat the battery fully, engage its retention mechanism and keep straps flat rather than twisted.
Check security by trying to move the battery gently by hand. It should not slide along the tube, rotate towards your legs or work loose in its holder. If tightening does not solve movement within the approved fitting method, stop and reassess the fit. More force is not a mounting plan.
Route cable
Run the lead where it stays clear of tyres, spokes, cranks, the chain and suspension pivots. Follow the manufacturer’s routing guidance and use suitable cable retainers without crushing the lead.
Leave enough movement near the handlebar for full steering travel. Keep connectors free from tension, and do not force a sharp bend where the cable enters the plug or battery. Secure excess cable so it cannot form a loose loop beside moving parts.
Test movement before riding
Turn the bars through their full usable range. Watch the cable at both ends: it must not pull the connector, snag a control or stop the bars turning normally.
Check suspension clearance using the bike manufacturer’s recommended procedure. Clearance at rest does not establish clearance throughout suspension travel. If you cannot assess that safely, ask a bike mechanic rather than guessing.
Finally, switch the light on and check its operation while gently moving the bars. Start with a short check in a safe place, then recheck the mount before committing to the trail. Any sliding, snagging or interrupted light output means stop and investigate.
Which frame position should you use?
Use a position approved for your mounting system that passes the clearance checks on your bike. Neither the top tube nor the down tube is automatically the right answer; tube shape, suspension layout and cable length all affect the fit.
These are positions to assess, not universal mounting recommendations:
| Position | Best for | Practical advantage | Main drawback to check |
|---|---|---|---|
| Top tube, where permitted | Riders whose approved mount fits without leg interference | Lets you inspect the pack and straps readily | Knees, standing movement and frame bags can conflict with the pack |
| Down tube, where permitted | Bikes with suitable mounting space and cable reach | Can keep the top tube clear | Bottle access, front-wheel clearance and debris exposure need checking |
| Inside a compatible frame bag | Riders using a bag and battery arrangement approved for that use | Keeps the pack contained rather than exposed on a tube | The pack still needs restraint, protected connectors and suitable cable access |
Do not put an external battery loose in an ordinary bag and call it mounted. Containment and restraint are different jobs. Follow the battery instructions on enclosure, ventilation and exposure, as well as the bag’s intended use.
If every position creates a problem, reconsider the holder or light arrangement. The bike should not become awkward to steer or pedal just to accommodate the battery.
Why battery mounting varies between bikes
A frame-mounting arrangement that suits your mate’s bike does not automatically suit yours. Use these checks when building or updating your rechargeable bike lights setup in 2026:
- Frame shape: the holder needs stable contact rather than balancing on an unsuitable tube profile.
- Suspension movement: a pack or cable must stay clear as the frame and wheel move.
- Cable reach: the lead needs to reach the light without tension or an exposed trailing loop.
- Other equipment: bottles, bags, controls and existing cable runs need their own space.
- Rider clearance: your knees and riding movements must not knock the battery or straps.
- Mounting instructions: approved attachment methods and frame restrictions take priority over a convenient-looking spot.
High-capacity battery packs belong in the same buying decision as the light and mount. Check the pack’s listed dimensions and the holder’s compatibility before ordering; capacity alone does not tell you whether the setup fits.
Bikelights is for night riders shopping for bike lights and high-capacity battery packs together. When browsing Bikelights, check the stated contents and compatibility of each listing rather than assuming a holder, charger or particular battery comes with the light.
Build your night-riding setup
Check bike lights, high-capacity battery packs and accessories against your mounting and compatibility needs.
How tight should the battery straps be?
Tighten battery straps to the mount’s instructions, not to an invented universal setting. The aim is secure retention without damaging the frame, pack, holder or nearby cables.
After fitting, check whether the pack slides or rotates under gentle hand pressure. If it does, inspect strap routing, contact surfaces and holder fit before adding force. A mismatched mount does not become compatible because you pull harder.
Recheck after the initial ride and whenever you remove or reposition the battery. Look for wear beneath the straps as well as looseness; a secure-looking pack can still rub against the frame.
Can you use cable ties to hold an external battery?
Do not substitute cable ties for the battery’s approved holder or retention straps. Use cable ties only where the equipment instructions allow them, such as suitable cable-management points, and never tighten them enough to crush a lead.
Cut ends and tight bends also need attention. Keep fastening hardware away from your legs and from places where it can rub through cable insulation. If a mounting component is missing or damaged, replace it with a compatible part instead of creating a trail-side permanent solution.
What should your pre-ride mounting check include?
Make this part of your 2026 night-ride routine, alongside checking the light operates and the battery is charged. Perform the check with the equipment positioned as you will actually ride it, including bottles and bags.
- Battery: seated correctly, retained securely and free of visible damage.
- Straps or holder: engaged properly, with no slipping or damaged fastening surfaces.
- Frame contact: clean, stable and free of trapped hoses or cables.
- Cable: retained away from moving parts, with steering slack and no connector tension.
- Bike movement: steering, pedalling and suspension clearance checked.
- Light operation: steady operation during the movement check, with any fault investigated before departure.
Carry out another check after a crash, a hard knock or an adjustment. Do not reach down to fix a moving battery while riding; stop somewhere safe first.
Mounting security and runtime planning are separate checks. A firmly fitted battery still needs enough verified runtime for your ride, at the operating conditions stated by the manufacturer. Do not turn a capacity figure or an advertised brightness claim into a promised riding duration.
FAQ
Where should I mount an external bike-light battery?
Mount an external bike-light battery where its approved holder fits securely and the pack clears your legs, wheels and suspension. Check the bike and battery instructions before choosing a tube or bag position.
How do I stop my bike-light battery sliding down the frame?
Stop battery movement by checking the approved holder fit, strap routing and clean contact surfaces. If the battery still slides when fitted correctly, change the mounting arrangement rather than overtightening it.
How much slack should a bike-light battery cable have?
Leave enough cable slack for full steering and the movement required by your bike’s suspension layout. There is no universal cable length: test the actual route and secure excess lead away from moving parts.
Can I put an external bike-light battery in a frame bag?
Use a frame bag only if the battery and bag instructions permit that arrangement. Secure the pack inside, protect the connectors and follow any enclosure or ventilation requirements.
Will a bigger battery work with my rechargeable bike lights?
A bigger battery works only when its electrical specifications and connection requirements match your rechargeable bike lights. Check mounting fit too; higher capacity does not establish compatibility or guarantee a particular runtime.
Should I remove the battery before charging it?
Follow the battery manufacturer’s charging instructions, including whether removal is required. Do not charge a damaged pack, and use the specified compatible charger.
What should I check when buying a complete light setup?
Check the light, compatible battery, mounting hardware, cable arrangement and charger requirements together. With Bikelights or any other seller, confirm the listed contents rather than assuming every necessary component is included.
One last thing
Before your next 2026 night ride, check the battery mount with your usual bottle and frame bag fitted. An empty bike makes clearance look generous; your actual riding setup is the one that matters.
Practise removing and refitting the battery at home. You want to know how the retention mechanism works before you need to handle it in the dark. Leave the cable relaxed, the pack secure and the improvisation at home.