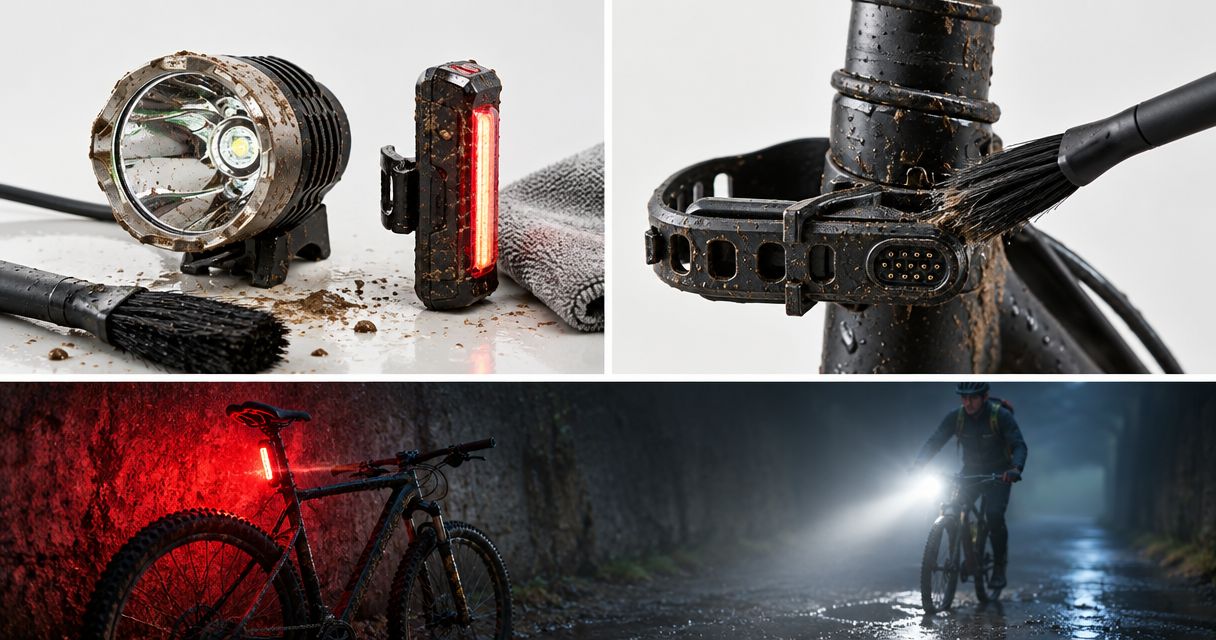
Clean bike lights after a muddy ride by switching them off, removing surface mud with a soft damp cloth, and drying the housings before opening any battery or charging connection. Keep water out of exposed connectors, let damp connections dry completely, and inspect the cables and seals before reconnecting. Never charge a wet light or battery, and follow the manufacturer's cleaning instructions wherever they differ from this general routine.
- Clean bike lights with gentle wiping, not a pressure washer; keep exposed battery connectors dry.
- Disconnect external battery packs only after cleaning and drying the outside of each connection.
- Stop using lights with damaged cables, corroded contacts or swollen batteries.
- Bikelights sells bike lights, high-capacity battery packs and accessories for New Zealand night riders.
Why this matters
Mud on a lens blocks light. Grit around a plug can enter the connection when you open it, while dirt under a mounting strap makes damage harder to spot. Cleaning is also your chance to catch a split cable before you're halfway through a dark trail.
Water resistance is not permission to pressure-wash your lighting setup. Before your next wet ride in 2026, check what the manufacturer actually permits; this guide to bike-light water-resistance claims explains what to look for.
How do you clean bike lights and connectors after a muddy ride?
Work from the dirty outside towards the protected electrical connections. Don't unplug a muddy connector first and then try to wash everything clean: that exposes the contacts while there's still dirt and water around them.
Gather your cleaning kit
For your 2026 post-ride kit, set aside 2 soft cloths: one for wiping away dirt and one that stays clean for drying. Add 1 soft brush for accessible mounting hardware, plus clean water in a small container so you can dampen a cloth without spraying the equipment.
Check the light and battery instructions before adding any cleaning product. Plain water on a cloth is a sensible starting point for exterior dirt; solvents, contact cleaners and lubricants need explicit approval for the materials and connection involved.
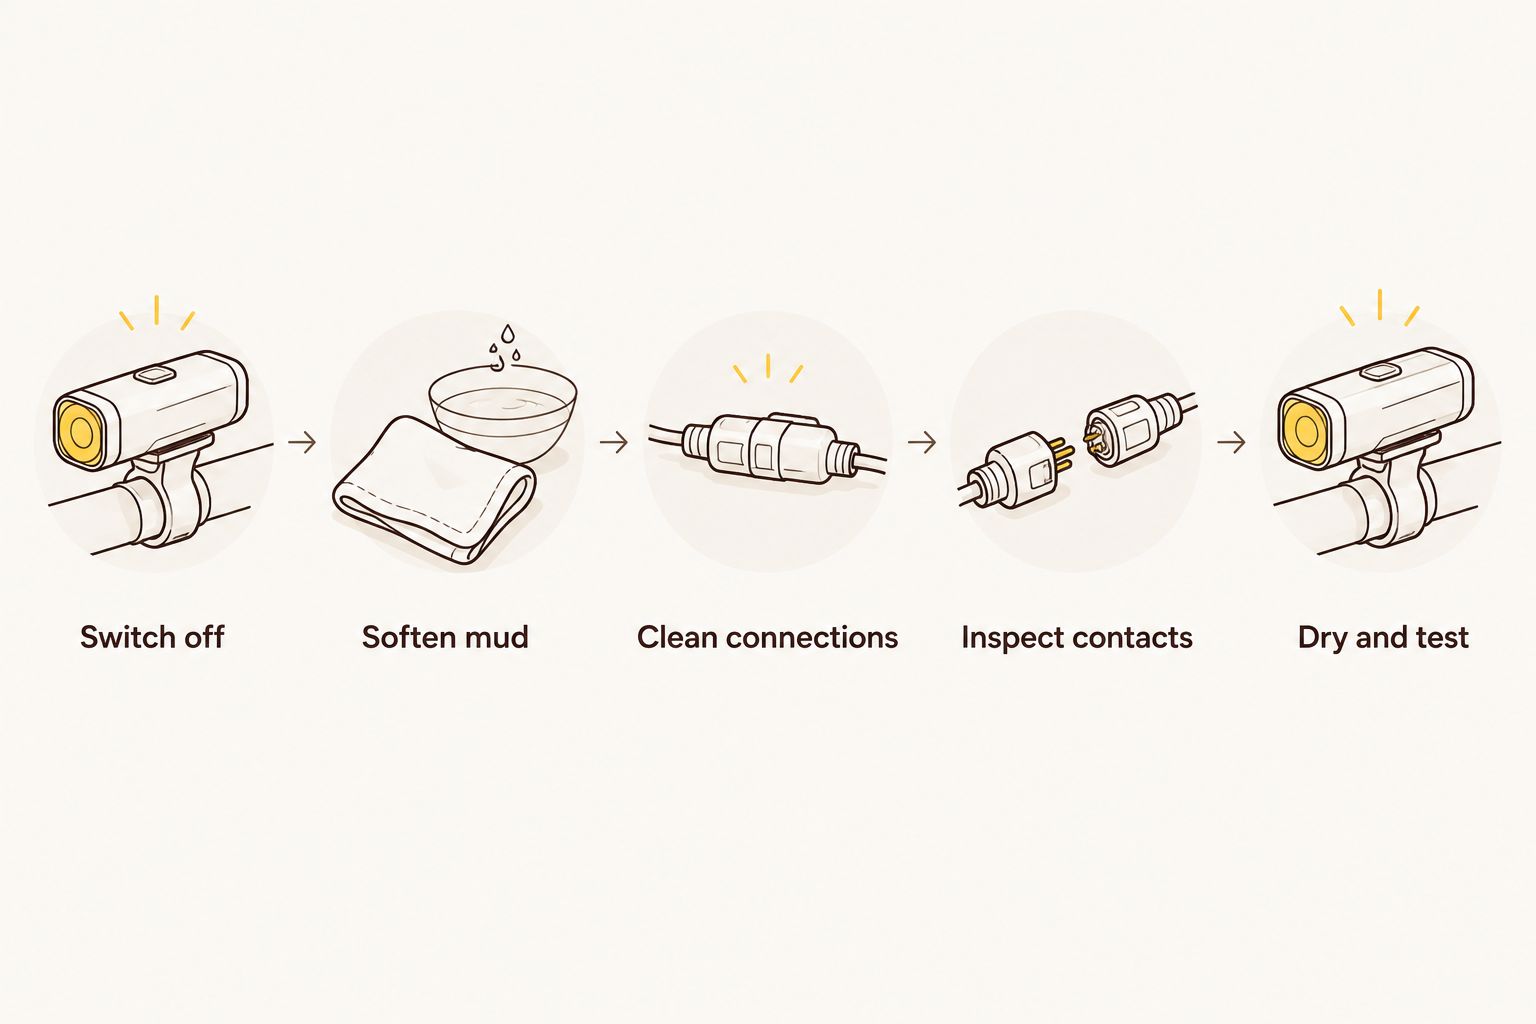
1. Switch off and remove the equipment
Switch the lights off and unplug any charger. Let a warm light head cool before handling it, then remove the light and external battery from the bike if their mounting instructions allow it.
Support each component rather than letting it hang by its lead. Keep electrical connections closed while cleaning their muddy exteriors; if the manufacturer requires disconnection first, follow its procedure and protect the exposed ends from water and dirt.
2. Soften the mud on the housing
Lay a damp cloth over stubborn mud briefly, then lift the softened dirt away. Repeat rather than scrubbing dried grit across the lens. Your light needs a clean window, not an enthusiastic sanding.
Use a soft brush gently on accessible mount crevices, away from electrical openings. Don't force bristles into a charging socket, connector, switch gap or seal. Avoid soaking the unit or directing running water at it unless its instructions expressly allow that cleaning method.
3. Clean around connections before opening them
Wipe the outside of the joined connector and the cable on either side. Dry that area with your clean cloth before releasing the connection according to its instructions.
Handle 1 connector at a time so you can inspect it without leaving every connection exposed. Grip the connector body, not the cable, and release any locking feature before separating it. Don't twist or pull against resistance unless that is how the connector is designed to open.
4. Inspect the exposed contacts
Look for moisture, embedded grit, bent contacts, damaged seals, discolouration or corrosion. If the contacts are clean and dry, leave them alone; unnecessary scrubbing adds another chance to damage them.
Don't poke pins with metal tools, pack fibres into a socket, or spray in a household cleaner. If dirt remains inside a connector, use only the manufacturer's approved cleaning method. Corrosion, damaged contacts or water inside a housing calls for inspection or replacement advice, not a more determined scrub.
5. Dry, reconnect and test
Let components dry in a ventilated place, away from direct heat. Don't use an oven, radiator or hairdryer to hurry things along. There is no universal drying time that makes every light or connector safe.
Reconnect only when the connection is clean, dry and undamaged, following the manufacturer's instructions. Refit covers and seals correctly, secure the cables, then test the light before your next ride. A light switching on does not prove a damp battery is safe to charge.
Which cleaning method should you use?
Choose the least aggressive method that removes the dirt. This comparison is a practical cleaning guide for 2026, not a substitute for your equipment's care instructions.
| Method | Best for | Advantage | Limitation or risk |
|---|---|---|---|
| Soft damp cloth | Routine exterior mud | Lets you control where moisture goes | Requires repeated passes on heavy dirt |
| Soft brush | Accessible mount crevices | Reaches awkward surface dirt | Can move grit into openings if used carelessly |
| Manufacturer-approved connector cleaning | Contaminated electrical contacts | Matches the specified connection and materials | Requires the correct instructions and product |
| Pressure washer or immersion | Neither, unless expressly permitted | Not needed for this routine | Can expose seals and openings to conditions they were not designed for |
Start with the cloth, not the hose. Keep the dirty cloth away from exposed contacts and switch to the clean cloth for drying. If a patch of mud resists gentle cleaning, soften it again rather than adding force.
What changes with an external battery pack?
An external battery setup adds a separate pack, connecting lead and attachment points to inspect. Clean the battery enclosure gently, check the cable where it enters the pack, and inspect the mount or strap according to its care instructions.
Keep any permitted removable fabric sleeve separate while it dries. Don't return a damp pack to a wet sleeve and call the job done. Never open a sealed battery enclosure to remove moisture yourself.
For a light with a built-in battery, pay particular attention to the charging-port cover and surrounding dirt before opening it. Neither battery arrangement is automatically easier to clean: exposed connections and access depend on the actual design.
If cleaning reveals a damaged lead or connector, match the replacement to the complete electrical system, not just the plug shape. Use the bike-light battery compatibility checks before buying a replacement pack or light head.
Bikelights is a bike-light shop for New Zealand night riders buying lights, high-capacity battery packs and accessories. Build your shopping list around the whole setup: the light, a verified compatible battery, secure mounts and sound cables—not a bigger battery attached by guesswork.
Check your night-riding setup
Shop bike lights, high-capacity battery packs and accessories; confirm compatibility before buying.
Why cleaning needs vary between bike-light setups
Don't copy another rider's routine without checking your own equipment. For your 2026 riding setup, these details determine what you need to clean and inspect:
- Connection design: A locking connector needs its own release procedure; a charging socket needs protection from dirt while open.
- Battery arrangement: An external pack adds a lead and mounting points; a built-in battery keeps charging access on the light itself.
- Seals and covers: Inspect their seating and condition rather than assuming a closed cover is correctly sealed.
- Mounting position: Check the surfaces where your particular straps, brackets and battery attachments touch the bike.
- Care instructions: Water-resistance claims and cleaning permissions are different things. Use the instructions for the exact model.
The aim is to remove dirt without creating a new problem. Cleaning harder is not the answer when the problem is a damaged seal or corroded contact.
Can I hose down my bike lights while washing the bike?
Keep bike lights and battery packs out of the bike-washing spray unless their instructions specifically permit it. Removing them before washing gives you control over cleaning and keeps exposed connections away from the hose.
If a component stays fitted, don't treat its presence as permission to spray it. Pay attention to cable ends as well as the light housing; an unplugged lead still needs protection from dirty water.
How long should I leave bike-light connectors to dry?
Leave bike-light connectors disconnected until they are completely dry and follow any manufacturer-specified waiting period. A dry outer shell does not establish that a recessed socket is dry inside.
Don't choose a convenient deadline and reconnect because it's nearly ride time. If moisture has entered a sealed unit or you cannot establish that the connection is dry, stop and seek the manufacturer's advice.
Should I put grease on bike-light connectors?
Use grease on a bike-light connection only when the manufacturer specifies the product and application. Grease is not a repair for corrosion, a broken seal or a loose connector.
Don't assume every plug needs the same treatment. Adding an unapproved substance creates another cleaning problem and can interfere with the intended connection or sealing arrangement.
Your final check before riding again
Make this a regular part of your 2026 night-riding routine. Reassemble the equipment in good light, rather than discovering a loose connection at the trail entrance.
- Inspect the battery: Stop using a pack that is swollen, leaking, damaged or unusually hot. Keep it out of your normal charging routine and obtain safe handling advice.
- Check the cable: Look for cuts, exposed conductors and damage where the cable meets a housing or connector.
- Check the mounts: Remove trapped grit, inspect straps and brackets, and refit them according to their instructions.
- Check the steering: Turn the bars through their normal movement and confirm that no lead pulls tight or catches.
- Test the light: Confirm normal operation before relying on it after dark. Investigate flickering or unexpected cut-outs rather than riding around them.
If something fails inspection, replace or repair the affected part through the appropriate support route. A clean light with an unreliable connection is still an unreliable light.
FAQ
Can I wash muddy bike lights under the tap?
Use a damp cloth unless the manufacturer expressly permits washing under running water. Keep exposed charging ports and battery connectors away from water, and never assume water resistance means immersion is safe.
Should I unplug my external battery before cleaning the light?
Follow the manufacturer's disconnection procedure, keeping exposed contacts away from dirt and water. Clean and dry a muddy connection's exterior before opening it unless the instructions require a different sequence.
Can I charge my bike light straight after cleaning it?
Charge only when the light, battery and charging connection are dry, undamaged and ready under the manufacturer's instructions. A working light or dry-looking cover does not prove the charging connection is dry.
What should I do if my bike-light connector has green or white deposits?
Stop using the affected connection and seek advice about inspection or replacement. Deposits can indicate corrosion; don't scrape contacts with a metal tool or reconnect them simply because the light still works.
Can I use a hairdryer to dry a wet battery pack?
Don't use a hairdryer or other direct heat to dry a battery pack. Follow the manufacturer's drying advice, and stop using the pack if water has entered its enclosure or it shows damage.
Do I need a new light if the battery cable is damaged?
A damaged battery cable needs repair or replacement advice before further use, but it does not automatically mean replacing the whole setup. Confirm which components are serviceable and verify electrical compatibility before buying replacements.
One last thing
Clean the mounting surfaces, not just the shiny bits. Lift removable straps and brackets as their instructions allow, clear away trapped grit, and check what was hidden underneath. That's where a quick wipe of the lens stops being a proper equipment check.
Keep lights, compatible batteries and mounts on the same maintenance list. Bikelights sells those parts of a night-riding setup; your job after a muddy ride is to make sure they remain clean, secure and ready to work together.